Overview
This automated Etch-a-Sketch can draw simple black and white images like the the Mona Lisa:
Parts List
- 1x Etch-a-Sketch
- 1x Arduino UNO
- 2x Stepper Motors
- 1x 12V Power Supply for stepper motors. An old PC power supply works perfectly for this.
- 1x ULN2803
- 1x Breadboard
- 1x Foot of rubber tubing. It should have a 3/16in inner diameter and outer diameter of about 5/16in.
- 2x Motor Mounts (Sandstone material is recommended)
- Small zip ties (variety pack will cost less than $10 at a local hardware store)
- Gorilla Glue (local hardware store)
- These breadboard wires also work well for hooking it all up.
Mounting Motors
-
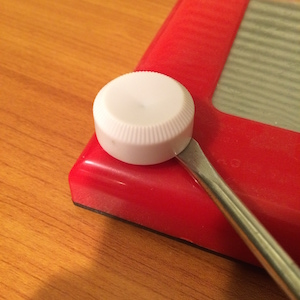
Start by removing the white knobs from the Etch-a-Sketch. A flathead screwdriver can pry them off:
-
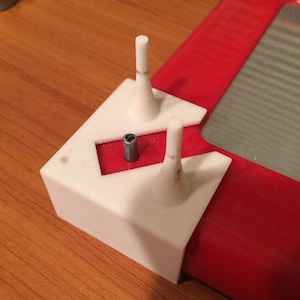
Place the motor mounts on the Etch-a-Sketch:
-
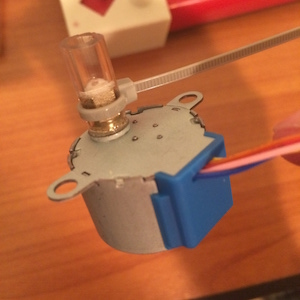
Now place the motors on the mounts with the wires directed towards the screen. The mount's poles may need to be sanded down to fit the motor:
-
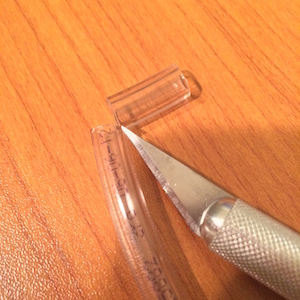
Next cut off two pieces of rubber tubing. Each piece should be 17 mm long:
-
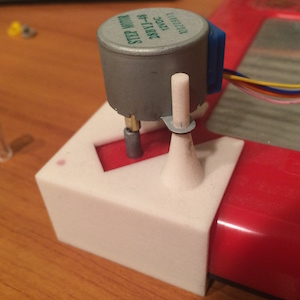
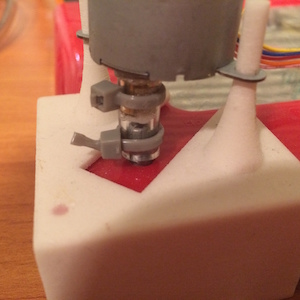
Put Gorilla Glue on the motor shaft and slide the tubing over the shaft. Use a small zip tie to ensure a tight fit between the tubing and motor. Let the glue dry for about 5 minutes. Once the glue has set twist the motor shaft back and forth a few times to break any glue that might prevent the motor from turning:
-
Place the motor back on the mount. The tubing should slide over the knob and connect the motor shaft with the knob. Use another zip tie to ensure a tight fit with the tubing and the knob:
Wiring
We use the ULN2803 to switch to the 12V required by the motors. The mapping between the Arudino output pins, the ULN2803 and the motors is described in the table and schematics below:
  Arduino        ULN2803          Motor
-----------    -----------    -------------
     4          In/Out 8       Right Orange
     5          In/Out 7       Right Yellow
     6          In/Out 6       Right Pink
     7          In/Out 5       Right Blue
     8          In/Out 4       Left Orange
     9          In/Out 3       Left Yellow
     10         In/Out 2       Left Pink
     11         In/Out 1       Left Blue
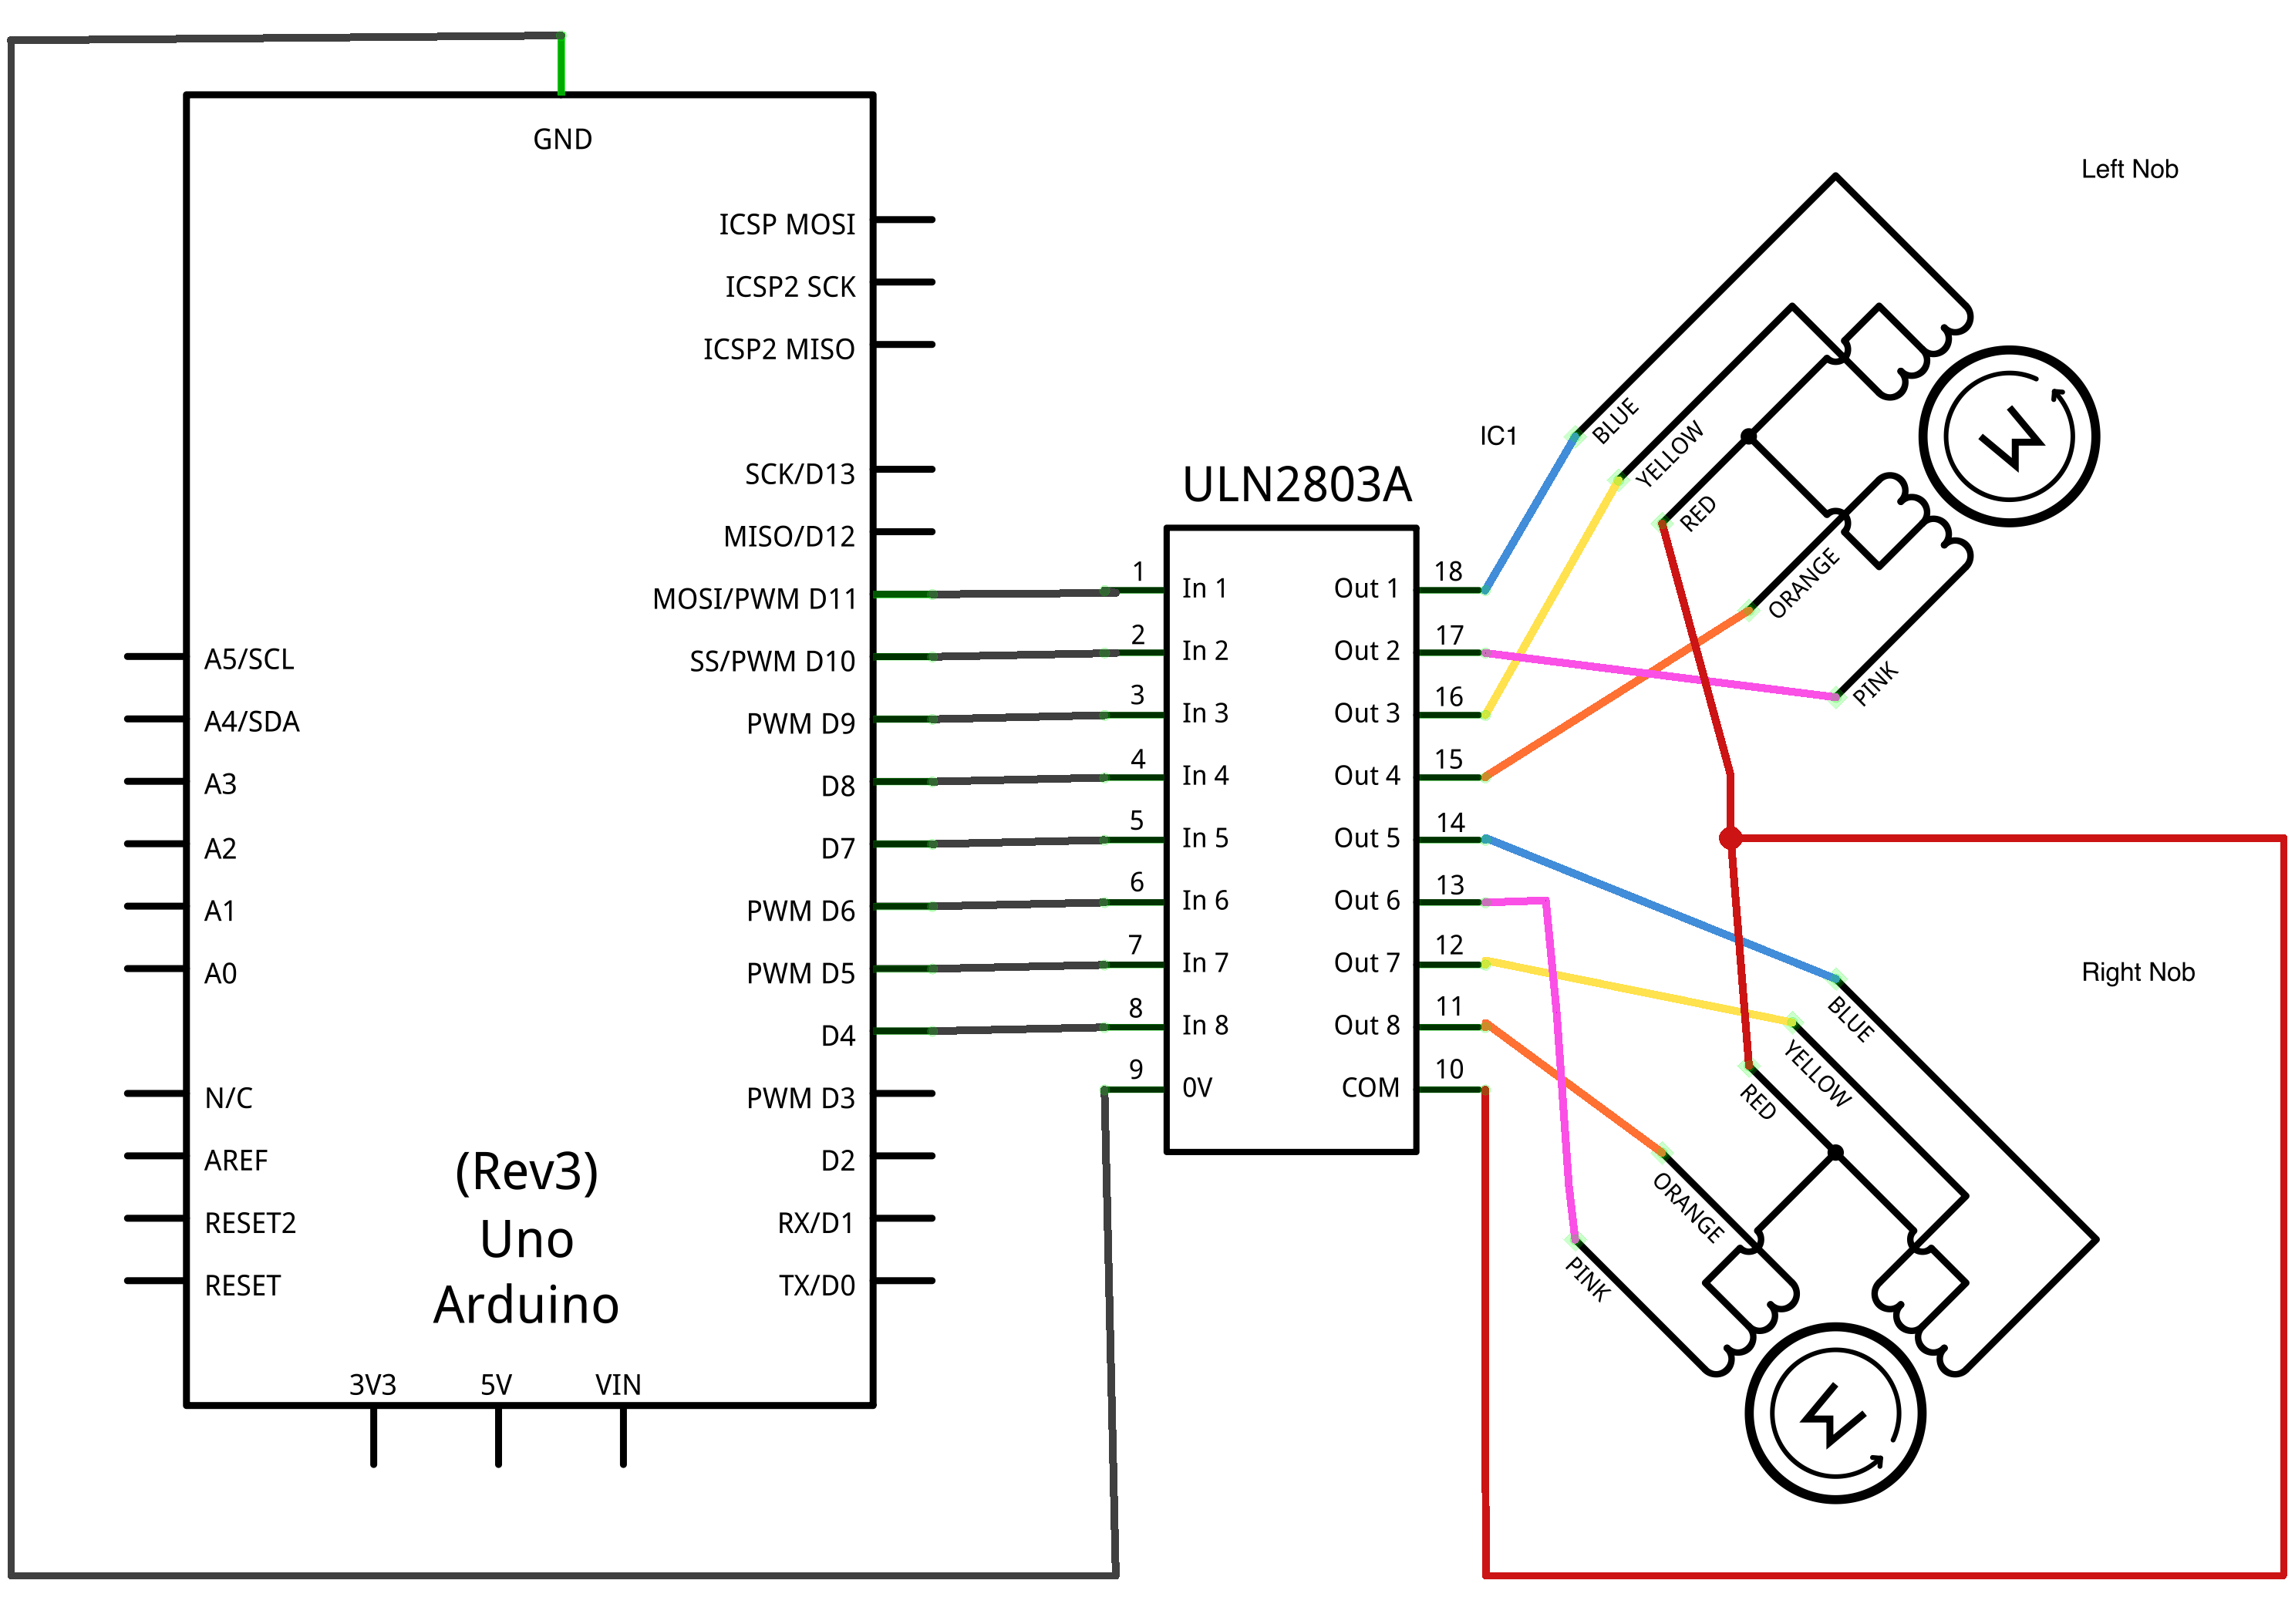
It's also important to connect the ULN2803's COM to the 12V source on the power supply. That's easily done by connecting the power supply to the breadboard's positive and negative lines.
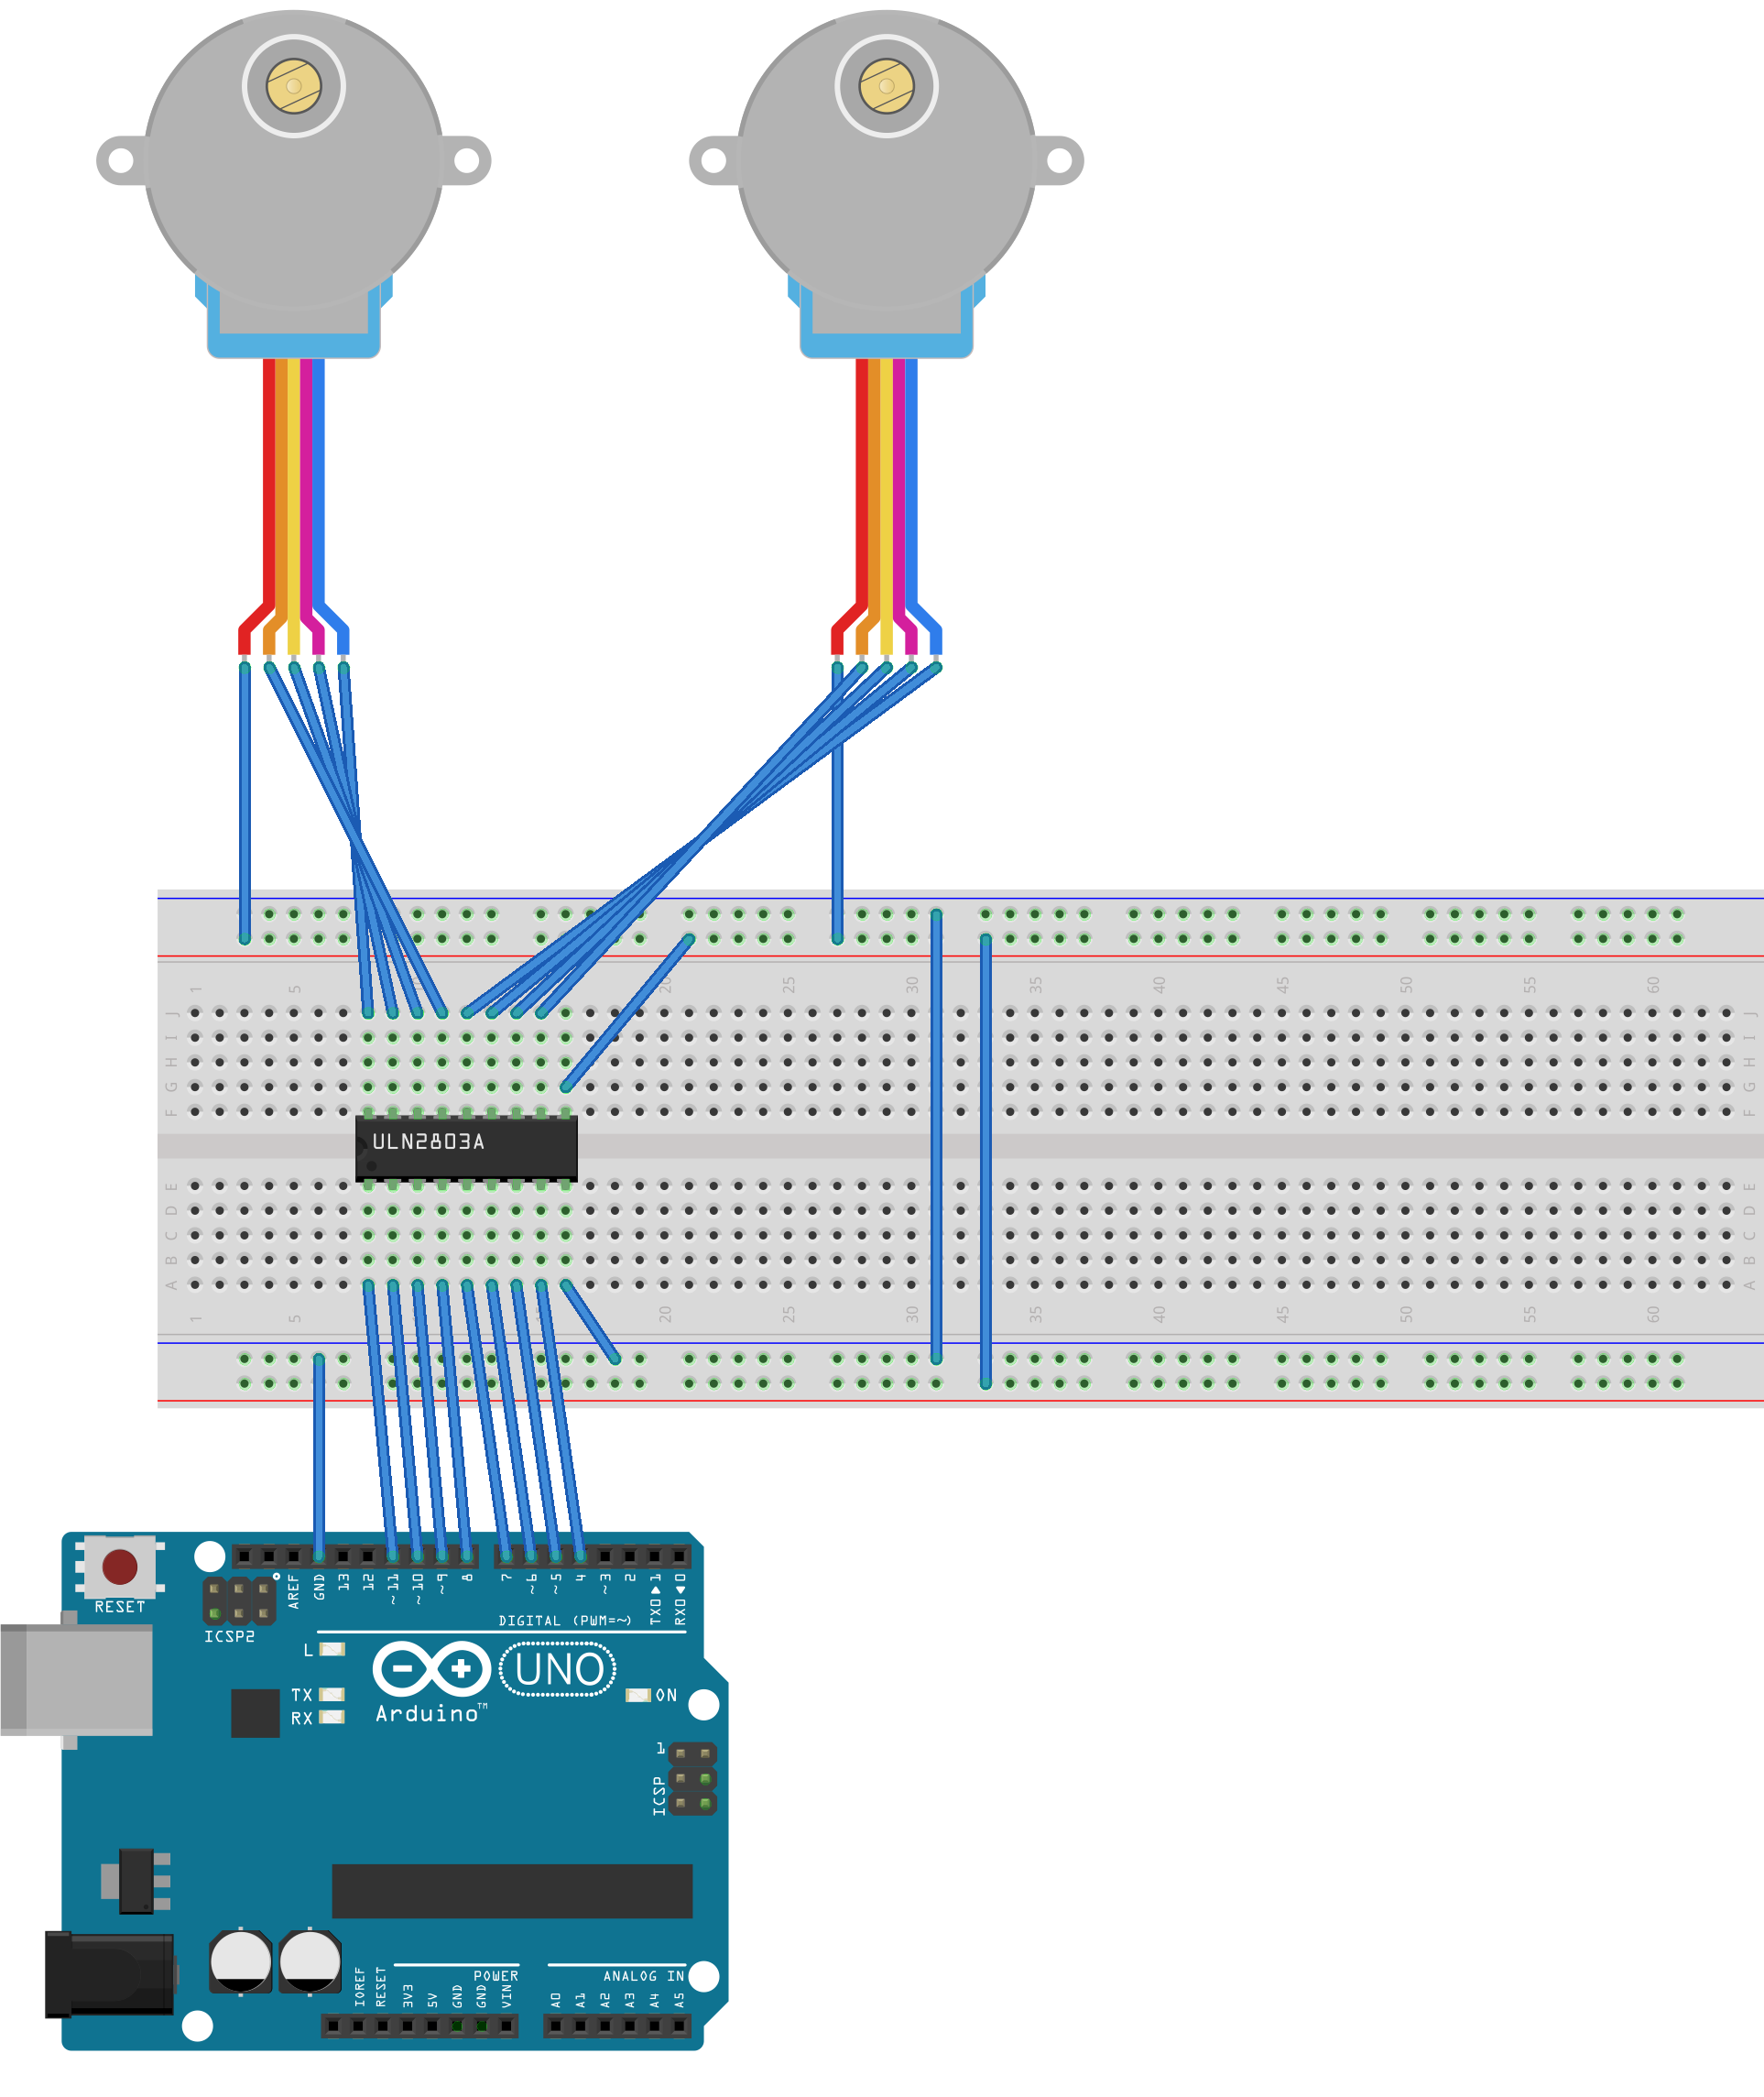
Once everything is wired up it should look something like this:
Software
- Checkout the source from github.
- Next use the Arduino Software to build and install the SketchTheEtch.cpp on the Arduino.
-
Install the following python dependencies Pillow (a PIL replacement) and pyserial. Both can be installed with pip:
pip install pyserial
pip install Pillow
-
From the source repo run:
python ControlScripts/control.py /dev/tty.PathToUsbDevice
The device path (
/dev/tty.PathToUsbDevice) will be the same as the one selected in the Arduino software. This script is used for positioning and testing the device. Here is a basic set of commands that can be issued at the prompt:d,c> d 40 #drives the head down 40 pixels d,c> r 20 #drives the head right 40 pixels d, u, l, r can all be used followed by an integer indicating the number of points to drive d,c> s #powers down the coils in the motors d,c> vtest #draws a series of shrinking circles
The Arduino Firmware works by receiving a vector to draw. It draws the vector and then sends a message back to the host indicating it is ready for the next command. The ImagePoints.py script takes a black and white image as input and traces through the solid black pixels. All the black pixels must form a single contiguous region.
As an example we can trace the Mona Lisa:
python ControlScripts/ImagePoints.py --device /dev/tty.PathToUsbDevice SamplesAssets/mona.png
The initial position of the head must be done manually. For mona.png the top center of the Etch-a-Sketch will work just fine.
It is also possible to save the drawing commands to a file and simulate the result in another program:
# Commands are logged to stdout when the --device option is not passed
python ControlScripts/ImagePoints.py SamplesAssets/mona.png > OutputCommands.txt
The output is vectors with a distance. The source repo includes a simple Mac app in MacEtchASketchSimulator to simulate the drawing commands. It can be built and run with Xcode. Once it is running open the file with the saved drawing commands: OutputCommands.txt.
Custom Images
The maximum resolution is about 550x370. However, I recommend images no larger than 500x320 to account for any error.
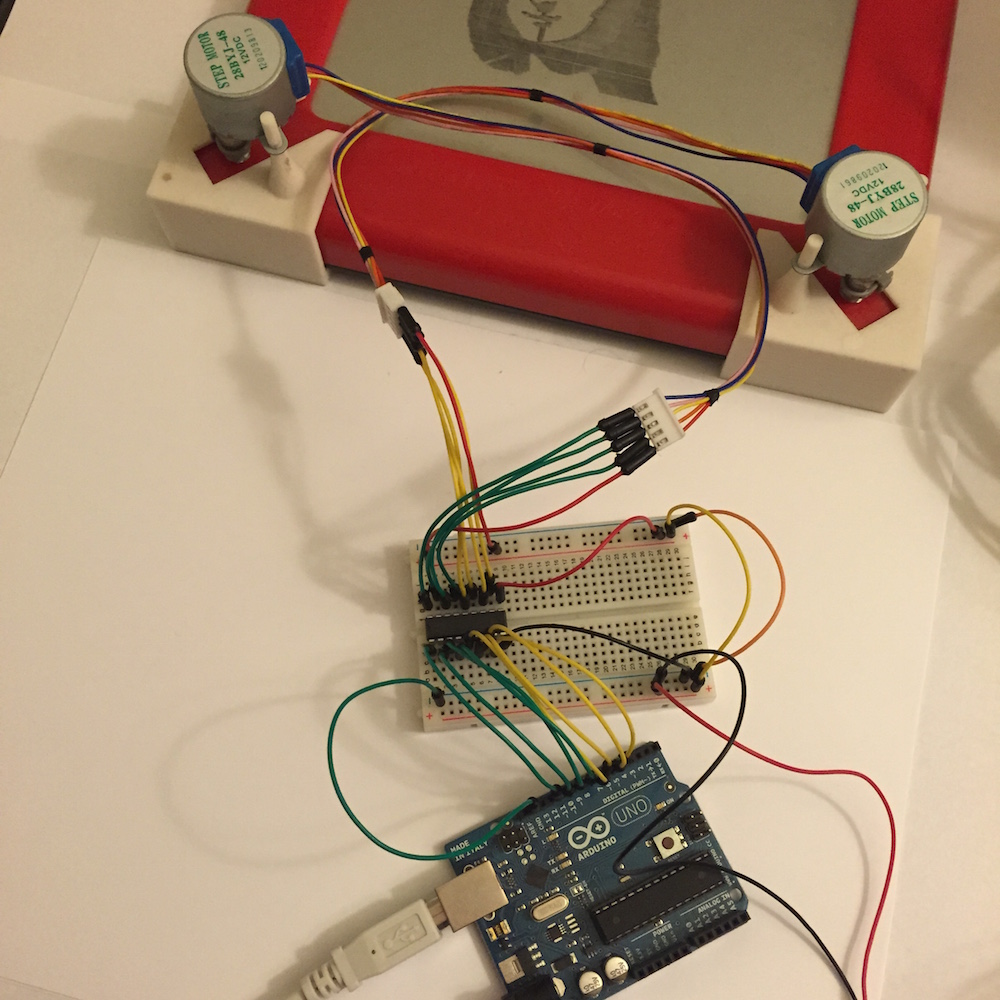
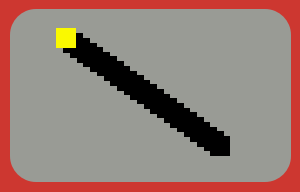
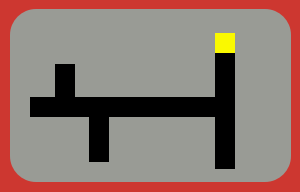
Tracing starts from the top of the image and works its way from left-to-right. The best initial position corresponds to the left most pixel in the first row of black pixels and its position relative to the rest of the image. The following samples illustrate the best initial position with a yellow square:
This project does not provide filters for converting any arbitrary image into something that can be drawn on the Etch-a-Sketch. There are a couple of scripts that will help process images into a more drawable form but images may require some editing by hand:
The first script is ImageScripts/Darken.py and can be used like this:
ImageScripts/Darken.py /path/to/image.png /output/image.png
The result is an image of only black or white pixels.
The next script, ImageScripts/Edges.py depends on the following python libraries:
pip install numpy
pip install scikit-image
pip install scipy
pip install matplotlib
Once these are installed, ImageScripts/Edges.py takes a single image as input:
ImageScripts/Edges.py /path/to/image.png
The result is a matplotlib window with various edge detection algorithms applied to the input image.
Known Issues
- Driving in one direction for a distance larger than about 75 pixels causes some error. The line won't be long enough typically.
- The motor mounts are not incredibly secure. However, the amount of error this contributes doesn't seem to be too much.
Contact
Feel free to contact me with any questions: annglove@gmail.com